Tuesday, December 09, 2014

Holiday Treat Boxes

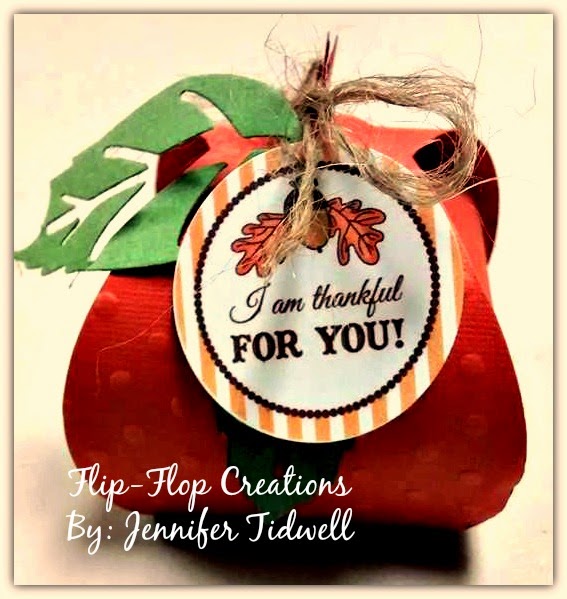
The Holidays are upon us and I have been busy making treat boxes with my Curvy Keepsake die from Stampin' Up! . They are so much fun and there are so many ways to decorate them. I have stuffed mine with Hershey Kisses, but they would also be terrific for small gifts. You know what they say... "Good things come in small packages". 
I hope you all have the Merriest of Christmas, the Happiest of Hanukkah and the Warmest Holiday Season. May you be blessed with loved ones to share it with. 


Tuesday, August 19, 2014

Just having a little fun playing with cameras.


This first one is a "Stampin' Up" stamp I just got. Don't you just love the older look to the camera?

This one is a little camera shaped card I made with my Envelope Punch Board, a couple circle punches and a Creative Memories zig-zag circle punch. 

Tuesday, July 15, 2014

When life gives you lemons...

Good Morning! Hope you are all doing well.
I'm here to share a card I made last night. I belong to a little card club here in the area and we meet twice a month. At each meeting we all bring a card to share, then we draw one person's name and they win all of the cards. Works out pretty good, unless you aren't particularly lucky. Lol
My daughter DRAGGED me to the craft store yesterday. (Woe, is me...) While I  was wandering the aisles aimlessly I saw this paper and thought of lemons. My mind started wandering into my crafty stash to TRY and remember if I still had this little Quickutz  "Citrus Slice" die. I wasn't sure, but I bought the paper anyway. Better safe than sorry...RIGHT?
I kept this one clean and simple (totally NOT me ). Hope you like it. 
Inside: tell your friends to bring salt and tequila!


Happy crafting y'all!!


Paper: Recollections - Yellow Gray Plaid 
Accessories: Quickutz - Citrus Slice, Sizzix - Swiss Dots embossing folder

Monday, July 14, 2014

Happy Campers!

Good Morning Blog Land!
This past weekend was all about camping for us at the Tidwell house. 

First of all, my boss' daughters are at camp this week and he asked me to make them both a card. One was having a Birthday too, so I made one of them for both occasions. I used my "Happy Camper" Cricut cartridge to cut out these cute 2 layer tents.

This is the inside...


and the most fun part of the weekend....


We drove to NC to pick up our new toy! The kids are getting older and it's time for me and the Hubby to take some weekend trips and explore a little. This little camper is so cozy. Can't wait to start hitting the road.


Paper: My Minds Eye - Quilting Bee, Jillibean Soup - Country Pumpkin Chowder,
 Bazzil Basics - Rain, Bitter Chocolate, Raven and Kraft
Accessories: Cricut - Happy Camper, Spellbinders - Octagon, Impression Obsession - Tree and Grass/Reeds die cuts, Bakers Twine & misc buttons

Tuesday, June 17, 2014

Deeper Than Any Ocean

Good Morning Blog Land! 

This week's challenge at Through The Craft Room Door is ANYTHING GOES, as always.
I chose to play with one of my favorite Tiddly Inks digital images, Mermaid Miranda. Don't you just love her? I was inspired by my recent visit to the ocean...YAY SUMMER! Anyone else glad it's finally here?


Sure hope you can join in on the challenge this week. We love to see all your beautiful submissions. 
AND don't forget to check out the newest edition of TTCRD magazine! The link is on my sidebar. 

I will leave you with a few pics from my mini-vacation...


feeling relaxed?


Image: Tiddly Inks - Mermaid Miranda
Sentiment: Create With TLC
Paper: Heidi Grace - Daydream, Recollections - Blue Card Stock
Accessories: Spellbinders - Labels One, Fiskars - Wave border punch, EK Success - 1 1/2" circle punch, Heidi Swapp - Edge Distresser, Lisa Murphy - Seam Bunding Ribbon, misc. charm

Tuesday, June 03, 2014

Thanks A Latte

Good Morning Blog Land!

Today's post will be my first post as a Designer for "Through The Craft Room Door".  I am super excited to be a part of this team. It's a great place to get inspiration, join challenges, chat about crafty topics and meet new crafty people. The newest edition of TTCRD magazine has just been published. There is a video and link on my side bar. You should check it out!! This week's challenge is ANYTHING GOES, as always.


My card for this weeks challenge was an experiment. Lol   I saw a card while browsing around Pinterest that had this amazing 3D "frame". I said, "Hey, I can do that". Then I said, "Okay, how are you gonna do that?"
First of all, I started with one of my Bestest crafty friend's digis! This lovely coffee cup was drawn by Kim Hecker of Oak Pond Creations. Isn't it adorable? They say ask and you shall receive...and I did. 
Thanks Kim, you're the best!!


It was quite simple after the first attempt. ( I only wasted one sheet of paper...HeeHee ) I used my Spellbinders Classic Square dies. I laid the largest one in the center of a 5 X 5 piece of card stock and traced around the edge with my embossing tool. Then I centered the next size smaller in the center of that and embossed around the edge of that one as well. You should have two squares embossed. Cut diagonally from corner to corner of the largest square and fold along the embossed lines to make the frame stand up. EASY PEASY!

It makes such a nice clean corner and frames your card so well. 

Then you just decorate and layer as desired. 

I hope you enjoyed my little tutorial. I will definitely be doing this one again. 


 Image: Oak Pond Creations - Grande
Sentiment: Verve Stamps - Delightful & Delicious
Paper: Websters Pages
Accessories: Spellbinders - Classic Squares, Fiskars - Paper Crimper


Thursday, March 27, 2014

New Coloring Tote!

Good Morning Blog land! 
I am here to share a crafty new addition to my addiction. Lol
I have been looking high and low for something to hold my "expensive crayons". I had an idea to use a garden tool caddy, so of course, I GOOGLED IT! I typed in tool caddy and this little lovely popped up. It is a Craftsman tool caddy from Sears. Can you believe it was only $12.99??? Woot-Woot!! I think my Copics, Spectrum Noir's and colored pencils have found a comfortable home. What do you think?


Here is a view from the top. You can see I put a some 4X4 boxes inside to divide the color families. 
Can you tell my favorite colors? 


I have been brushing up on my coloring after quite a dry spell. 
I have watched a few of Cheryl Alger's ( Sassy Cheryl ) coloring tutorials to refresh.
 There is a link to them on my side bar. Take a peek! 
I'm going to share this with the nosy ladies over there as Sassy Cheryl's Show Me Thursday blog. 
They are always up to no good...I mean fun stuff. :)

Hoping you have a wonderful day  ~jeni :)


Tuesday, March 25, 2014

Hopping By to Say Hi!

Hello Blogland! 
I just wanted to stop by and share a little card I made for my in-laws. 
They both have been feeling a little yucky lately and I wanted to send them a little "Happy". 

This little fellow is a cutie patootie from Tiddly Inks called "Little Hopper - Toadally Amazing". I have had him colored for over a year and was saving him for something, but I just didn't know what. I think I just liked to look at him. I'm okay with sharing him now though. 
I "toadally" missed the Green Challenge over at Tiddly Inks last week. Lol
This would have been perfect. 

I am entering this card into the "Anything Goes" challenge over at Through the Craft Room Door

Image: Tiddly Inks - Little Hopper
Paper: Heidi Swapp
Accessories: Fiskars - cloud punch and heart punch, Spellbinders - Classic Square, Bakers twine

Wednesday, March 12, 2014

Diaper Invitations

Good Wednesday afternoon my crafty friends! 
My second Grandson Luke is a week old today (man, I feel old) and I wanted to share the baby shower invitations I made for him. I knew I wanted to make one of those cute diaper invitations I spied on some of the regular card/scrapbooking sites, so I went on the hunt for a template. I saw so many out there but my favorite was over at Homemade Gifts Made Easy , I just loved it. 
I chose a precious light blue and a soft gray to go with this adorable patterned plaid paper. 
It seems like I am so obsessed with gray lately. It has become my favorite color. 


Here is a picture of the whole sha-bang. 
There is actually just one insert, but I wanted to show you the front and the back. 

Here is a close up of the cute little pin and baby feet charm....Awwwwww! 
I made his monogram in Microsoft Word and used a spellbinder to make a medallion, 
then backed it with a scalloped circle punch. 

Thanks for stopping by my little corner of the blogosphere.


I will leave you today with a whole lot of cuteness!
I would like to introduce you to my two Grandsons, Landon and Luke. 


Tuesday, March 04, 2014

Long time...no post!

Hey, I finally made a card! After a loooooong break from paper crafting I am slowly working my way back into my supplies. Don't get me wrong, I have still had some crafty days with my girls 
I haven't gone totally COLD TURKEY! My access to my supplies has just been limited. 
Hope to be back soon with another creation or just to visit all my old bloggy friends. 


Paper: American Crafts
Accessories: EK Success- scallop & stamp border punches, 
Creative Memories - heart punch, Spellbinders - Labels Die cut